


 TV Operators
  Healthcare
  Digital Signage
  Hospitality
  Education


 TV Operators
  Healthcare
  Digital Signage
  Hospitality
  Education
 Overview
Radix Streams is a new addition to the Radix Device Management platform. It is a content management system (CMS) that allows you to create a content carousel or slideshow with display rules. Once you have created a Stream, it is possible to add or remove slides, as well as to rearrange the order of the slides. The content can consist of:
- Images,
- Videos,
- URLs, or
- Creatives–A custom-made style sheet including text, images, clickable buttons, and more.
(For instructions on making a custom-made creative content item, see Creating Content for a Stream.)
Besides controlling the order of the images, you can also control how long each element will be displayed.
Creating a Stream
To create a Stream:
1. Click on the Streams icon in the sidebar menu to open the Streams Console.
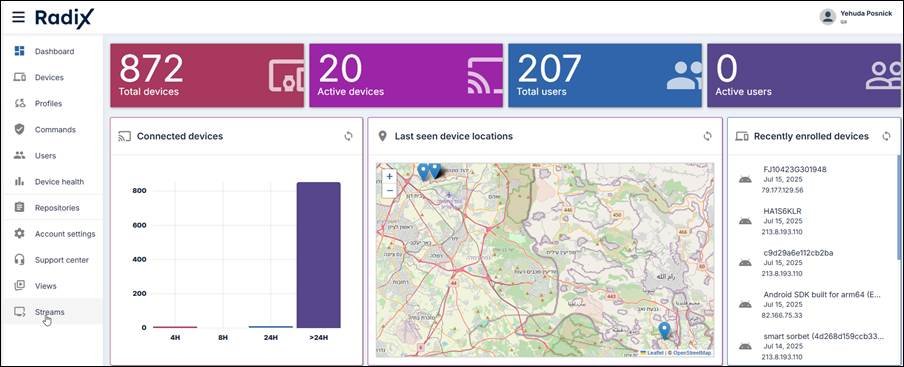
2. In the Streams console, click on Add Stream to create a new stream.
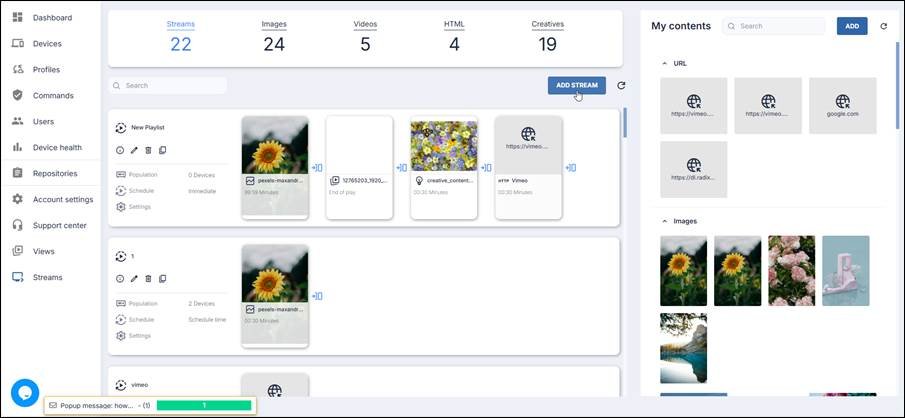
A blank Playlist opens.
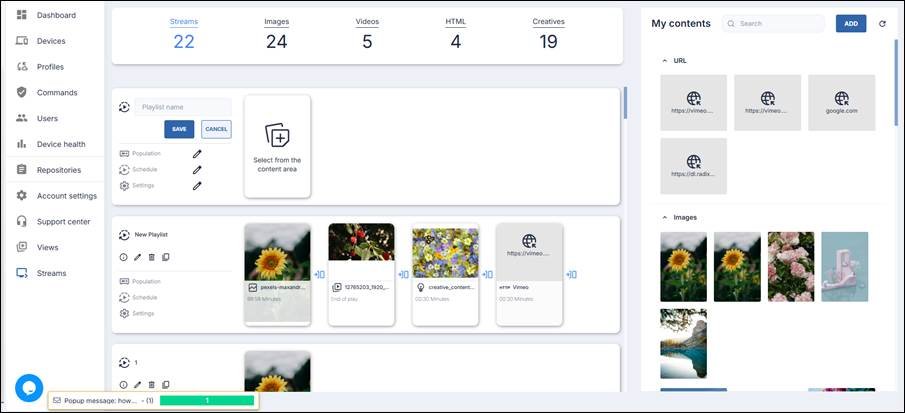
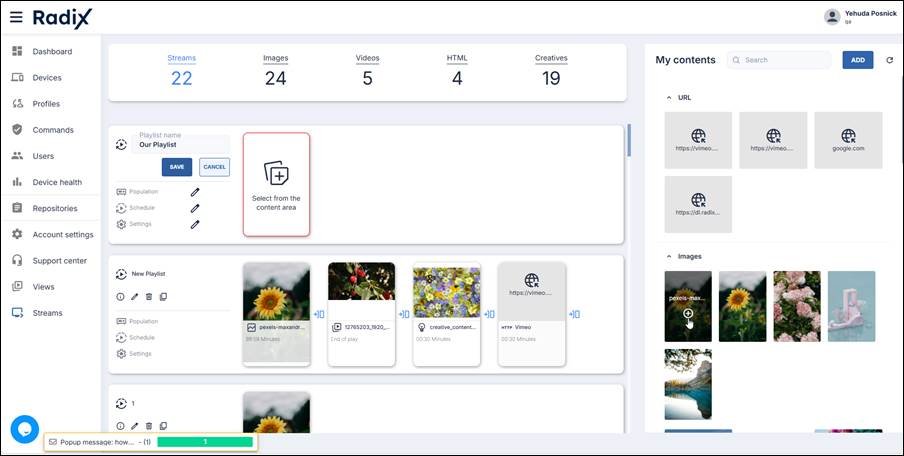
Assigning a Name to the Playlist
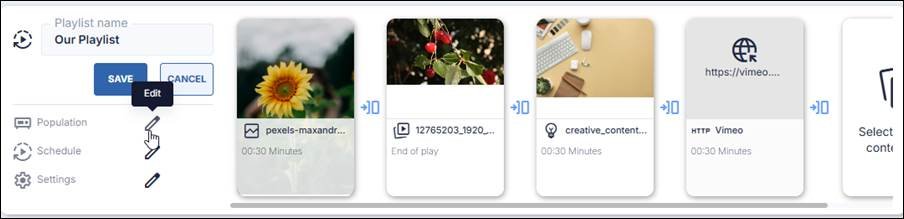
3. Assign a name to the Playlist. We will call it “Our Playlist”.
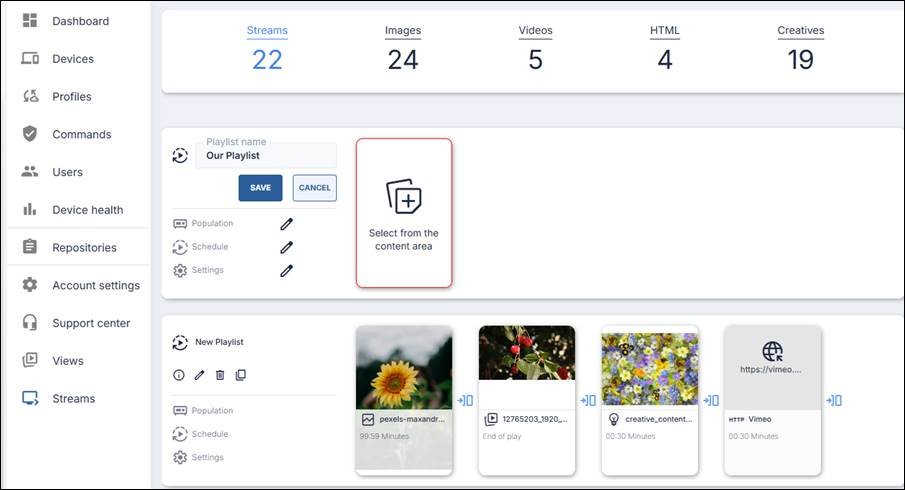
Adding content to the playlist
4. Click on the “+” on the content items in the right-hand pane to add them to the playlist. You can select a combination of URLs, Images, Videos, and original content.
Populating the Stream
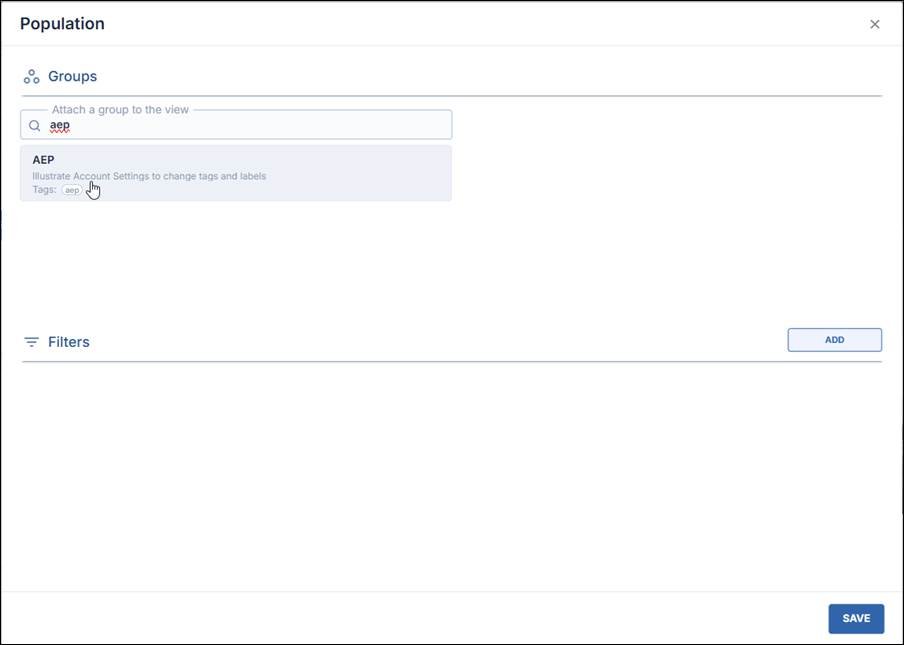
5. Click on the Edit icon next to Population to open the Population pane.
6. In the Population pane, select which groups of devices will display the Stream. In the example below, we selected group “aep”.
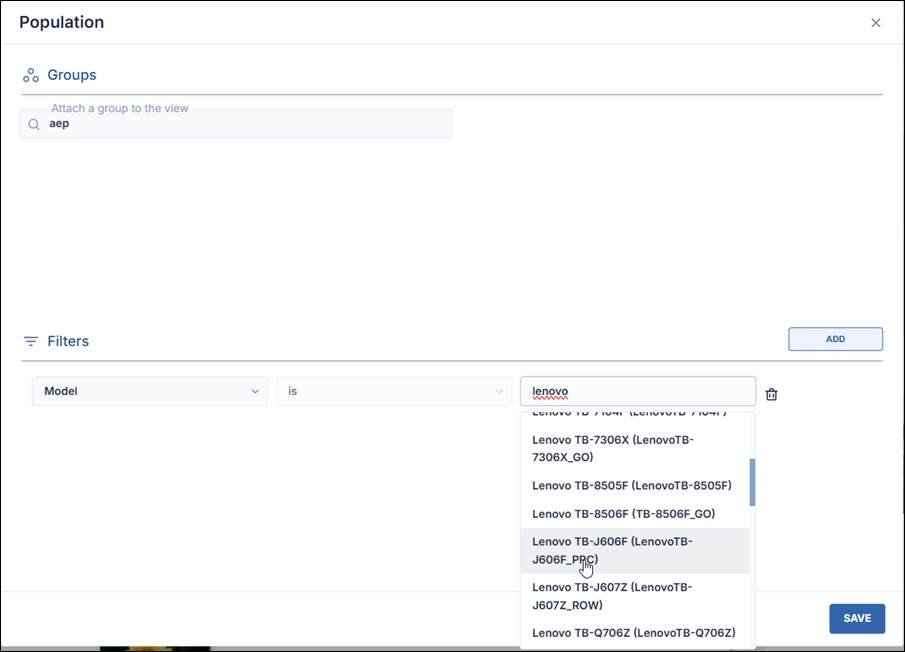
7. You may also apply a filter to display the Stream on only select devices in the group. Click on Add in the Filter pane to see the filter options. In our example below, we can apply a filter to only display the Stream on certain Lenovo devices.
8. Click Save to save your selection.
Setting a Schedule for Displaying the Stream.
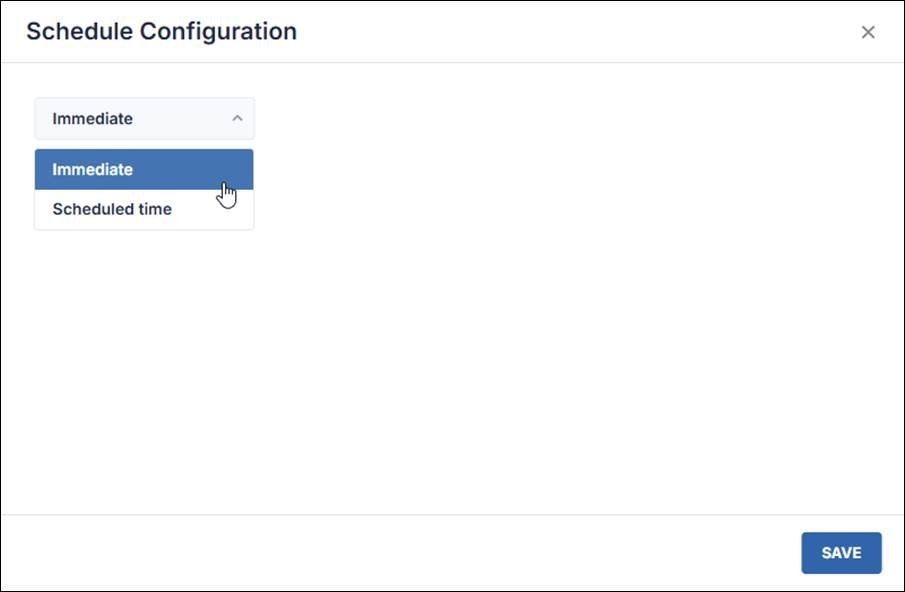
9. Click on the Edit icon next to Schedule to open the Schedule Configuration pane.

10. In the Schedule Configuration pane, specify whether you want to display the Stream immediately, or only on certain weekdays.
11. In the example below, we chose to display the Stream on a scheduled time, on Sunday July 20, 2025, between 12:42 to 13:42.
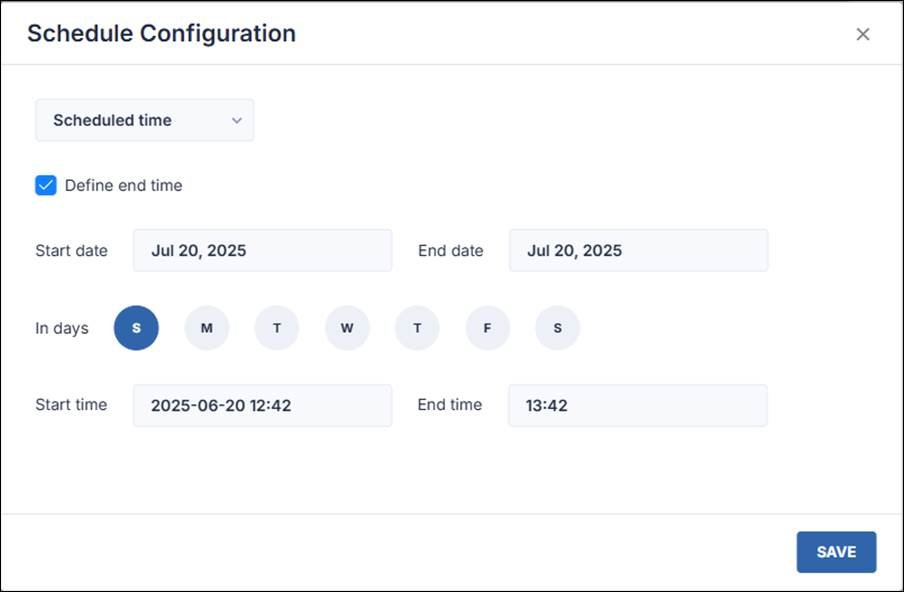
12. Click Save to save your selection.
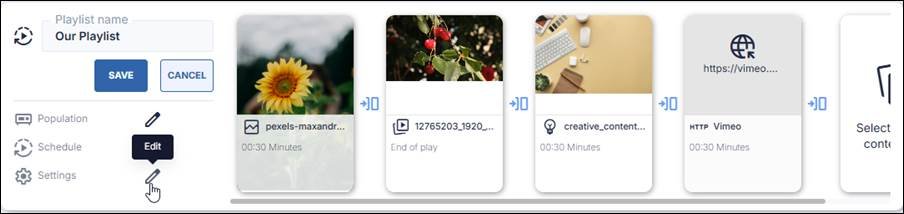
Adjusting Display Settings
13. If you wish to specify the display settings on the remote devices, click on the Edit icon next to Settings.
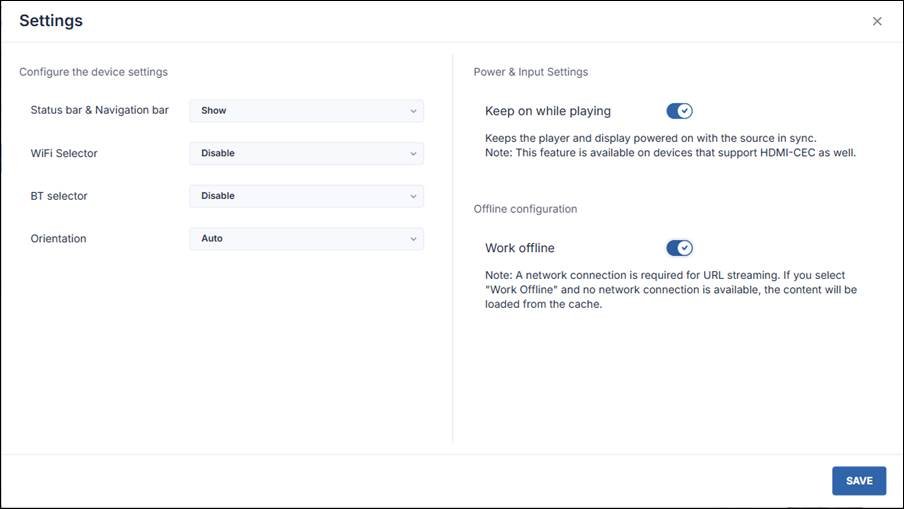
14. In the Settings pane, specify the display settings, and click Save to save your selection.
15. Click Save on the Playlist.
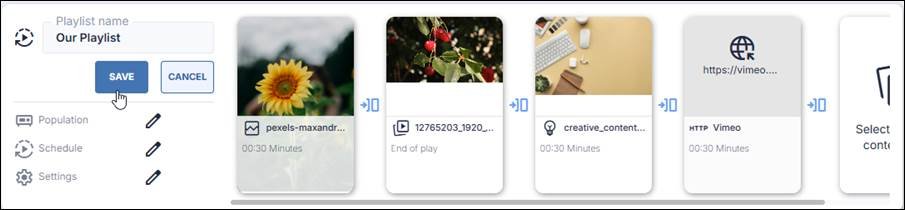
A notification appears in the lower right corner of the screen, indicating that the Stream has been saved.

The playlist will start displaying on the selected devices, according to the predetermined schedule.